Wednesday, May 18, 2011

How To Block Failed Login Attempts In Windows 7


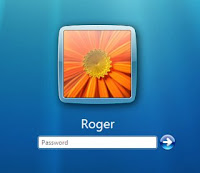
Even if you put a password on your computer, that doesn’t stop someone from breaking in by using a brute force password guessing technique.  Although more of a problem for Laptops than your home desktop, I’m going to show you a trick used by almost all corporations who run Windows.  Essentially what were going to do is run a command that will lock your login account for a specified amount of time after a specified number of bad login attempts (wrong password).  By doing this an attacker won’t be able to use an application to try a few million passwords per minute against your computer to break in since every 10, 20, 30 etc. attempts will lock the account for a few minutes thus killing any attempt to break in.  Here, let me show ya.


Step 1 – Launch CMD as an administrator
Click the Start Menu Orb and Type cmd into the search box.  Under the programs list that appearsRight-Click cmd.exe and Select Run as administrator from the context menu.

Step 2

In the command line, Type in the following command:
net accounts /lockoutthreshold:10
You can replace the number 10 with any number you like, this will determine how many incorrect password attempts can occur before a lockout is initiated.  Personally, 20 or even 30 should be fine but 10 is a good number for most people even if you commonly fat finger your password….


Step 3 – Set the account lockout duration

By default, when your account is locked due to the X failed attempts you set above, your account will be locked out for 30 minutes.   I personally think that’s a bit excessive.  My recommendation is you change it to something like 3 or 5 minutes so even if you fat finger your password, you only need to wait a few minutes to try your password again.  You can change this using the following command:
net accounts /lockoutduration:30
The lockout duration can be set to any value between 1 and 99,999 minutes.*  If you set it to 0, the account will be locked until an Admin unlocks it… Don’t do that.
*This range varies depending upon which version of Windows 7 you are running.


Done!

Now whenever someone attempts to break into your computer by guessing your password Windows will lock them out!


Tuesday, May 17, 2011

Facebook Spam – “See who has been stalking you / See who is visiting your profile ”

As more and more people are getting online on the popular social networking websites like the Facebook , spammers are creating new bait to spread spam . Some times it is the links like “Verify your account to prevent Spam” or “You have been tagged ”  and recently the “Watch the OSAMA shoot down video”  . The spam links points to fake videos or spammy websites or Facebook spam spreading apps .


Today I saw the “see who has been stalking you” (pic above) link posted by a friend of mine on my Facebook wall . She had actually curiously clicked on the same link when she saw it on her Facebook wall .And after the click , it got posted on all of her friends wall . Of-course everyone is interested in knowing “who has viewed my Facebook profile” but many of us do not know that it is not possible on Facebook (Yes , it is possible on Orkut) . Read the below faq from the Facebook :


Tuesday, May 3, 2011

How to block access to certain drives in Windows 7 ultimate/premium


I usually store all my important files and documents in one separate drive on my laptop and I always wish that no one else could touch them without my permission. And when I give my laptop to other people I always fear that the person using my lappy might access my personal files. If your computer is accessed by many people then you may want to restrict access to certain drives on your computer for other users.
To block access to drive go to Computer and right click on the drive and select properties. In the properties window click on ‘Security’ tab. Select the user account you want to restrict and click on edit.

Change the permissions according to your need for user groups or a particular user and click Apply and then OK.  It will not work for users with admin account as even they have the same rights as you so they can revert all permissions. You will need an admin account to perform this task.This trick is for Windows 7 ultimate and premium edition users.

How to install windows 7 from USB drive/Pen drive.


REQUIREMENTS:

  • 1GB RAM and 16GB Hard disk space
  • 1GHZ processor.
  • Windows 7 iso file.
  • Pen drive/ usb drive with 4GB space.
You can download windows 7 iso file from the direct download links given below.


Windows 7 beta (32 bit version)


Windows 7 beta (64 bit version)

7000.0.081212-1400_client_en-us_Ultimate-GB1CULXFRE_EN_DVD.ISO


Or just get a windows 7 DVD from somewhere if you can.
I assume that you have managed to get the Windows 7 DVD somehow by now. If you have the Windows 7 DVD in your hand then read on.

Follow the steps given below to install Windows 7 from USB drive.

  1. Insert your USB thumb drive.
  2. Open command prompt. If you are using vista open it with admin rights.
  3. Type diskpart and press enter.
  4. Type list disk.
  5. You will see all the disks connected to your system. If you don’t have any other disk than your Hard disk and pen drive then your pen drive will be Disk . You can guess your pen drive by it’s size also.
  6. If it’s disk 1 then type Select disk 1.
  7. Now before moving ahead take backup of your important data from pen drive as we will have to format the pen drive.
  8. Now go back to CMD and type CLEAN.This will remove partition or volume formatting from the 

    current in-focus disk by zeroing sectors
  9. Type CREATE PARTITION PRIMARY and press Enter. This will create a primary partition of length size and a starting address offset on the current drive.
  10. Type SELECT PARTITION 1 and press Enter.
  11. Type ACTIVE. this will mark the currently selected device as active.
  12. Now type FORMAT FS=NTFS and press Enter.This process may take some time. Wait for this process to end.This will format your USB drive.
  13. Type ASSIGN and press Enter. Then type EXIT .
  14. Now insert your Windows 7 DVD in the DVD drive. I will assume that your DVD drive is at D and USB drive is G. Look in your MY computer to know the drive letters for your PC.
  15. Now open new windows of CMD and navigate to your dvd drive using cmd. If your drive name is d then type D:
  16. Now type CD boot and press enter. Then type bootsect /nt60 H: (H is your usb drive letter).
  17. Now copy all files to your pen drive.
  18. Now the most important step: Reboot your PC and press F2 when the system restarts. This will take you in to BIOS Menu. Under the advanced bios options set the Primary boot device to your Pen drive. Now you are all set to install Windows 7 from USB drive.